Preprocess audio samples
While the CNN class in OpenSoundscape contains a default Preprocessor, you may want to modify or create your own Preprocessor depending on the specific way you wish to generate samples.
Note that the default preprocessor that is a good starting point for training, and if you’re using a pre-trained CNN for prediction you don’t need to (and probably shouldn’t!) modify the preprocessing. So, if you just want to train or predict with CNNs, you might not need to delve into the depths of this tutorial. However, for those trying to create high-performing custom models, using custom preprocessing is a powerful way to improve their performance.
This tutorial describes how you can use two important types of objects in OpenSoundscape to modify preprocessing.
Preprocessorsin OpenSoundscape perform all of the preprocessing steps from loading a file from disk, up to providing a sample to the machine learning algorithm for training or prediction. They are designed to be flexible and customizable. These classes are used internally by classes such asopensoundscape.ml.cnn.CNNwhen (a) training a machine learning model in OpenSoundscape, or (b) making predictions with a machine learning model in OpenSoundscape.Datasetsare PyTorch’s way of handling a list of inputs to preprocess. In OpenSoundscape, there are two built-in classes (AudioFileDataset) which use a Preprocessor to generate samples from a list of file paths.
Run this tutorial
This tutorial is more than a reference! It’s a Jupyter Notebook which you can run and modify on Google Colab or your own computer.
Link to tutorial |
How to run tutorial |
|---|---|
|
The link opens the tutorial in Google Colab. Uncomment the “installation” line in the first cell to install OpenSoundscape. |
The link downloads the tutorial file to your computer. Follow the Jupyter installation instructions, then open the tutorial file in Jupyter. |


Intro to custom preprocessing
Preprocessors are designed to be flexible and modular, so that each step of the preprocessing pipeline can be modified or removed. This notebook demonstrates:
preparation of audio data to be used by a preprocessor
how “Actions” are strung together in a Preprocessor to define how samples are generated
modifying the parameters of actions
turning Actions on and off
modifying the order and contents of a Preprocessor
use of the
SpectrogramPreprocessorclass, including examples of:modifying audio and spectrogram parameters
changing the output image shape
changing the output type
turning augmentation on and off
modifying augmentation parameters
using the “overlay” augmentation
writing custom preprocessors and actions
it also uses the Dataset classes to demonstrate
how to load one sample per file path
how to load long audio files as a series of shorter clips
How to access preprocessors
When training a CNN model in OpenSoundscape, you will create an object of the CNN class. There are two ways to modify the preprocessing:
Modify the model.preprocessor directly.
The model contains a preprocessor object that you can modify, for instance:
python model.preprocessor.pipeline.bandpass.bypass = TrueOverwrite the preprocessor with a new one:
my_preprocessor = SpectrogramPreprocessor(....) #this tutorial explains how to make a preprocessor
#... modify it as desired...
model.preprocessor = my_preprocessor
Notes on augmentations
While training, the CNN class will use all actions in the preprocessor’s pipeline. When runing validation or prediction, by default, the CNN will bypass any actions with action.is_augmentation==True.
Note that if you want to create a preprocessor with overlay augmentation, it’s easiest to use option 2 above and initialize the preprocessor with an overlay_df.
Information for Pytorch Users
If you’re looking to use OpenSoundscape’s preprocessing tools, but use PyTorch (or Jax) directly for the rest of your training workflows, this section is for you.
The opensoundscape.ml.datasets.AudioFileDataset subclases torch’s Dataset and can often be used as drop-in substitutions, just use a DataLoader collate function that returns the typical PyTorch DataLoader format: a tuple of (samples, labels) where each is a tensor with a leading batch dimension. A collate function with this behavior is provided in opensoundscape.ml.utils. Here’s a quick exmaple:
from opensoundscape import AudioFileDataset, SpectrogramPreprocessor
from opensoundscape.ml.utils import collate_audio_samples_to_tensors

preprocessor = SpectrogramPreprocessor(sample_duration=2,height=224,width=224)
audio_dataset = AudioFileDataset(label_df,preprocessor)

train_dataloader = DataLoader(
    audio_dataset,
    batch_size=64,
    shuffle=True,
    collate_fn = collate_audio_samples_to_tensors
)
Set up tutorial
[1]:
# if this is a Google Colab notebook, install opensoundscape in the runtime environment
if 'google.colab' in str(get_ipython()):
  %pip install "opensoundscape==0.13.0" "jupyter-client<8,>=5.3.4" "ipykernel==6.17.1"
First, import some packages.
[2]:
# Preprocessor classes are used to load, transform, and augment audio samples for use in a machine learing model
from opensoundscape.preprocess.preprocessors import SpectrogramPreprocessor
from opensoundscape.ml.datasets import AudioFileDataset, AudioFileDataset
from opensoundscape import preprocess

# helper function for displaying a sample as an image
from opensoundscape.preprocess.utils import show_tensor, show_tensor_grid


# other utilities and packages
import torch
import pandas as pd
from pathlib import Path
import numpy as np
import random
import subprocess
import IPython.display as ipd
Set up plotting
[3]:
#set up plotting
from matplotlib import pyplot as plt
plt.rcParams['figure.figsize']=[15,5] #for large visuals
%config InlineBackend.figure_format = 'retina'
Set manual seeds for pytorch and python. These ensure the training results are reproducible. You probably don’t want to do this when you actually train your model, but it’s useful for debugging.
[4]:
torch.manual_seed(0)
np.random.seed(0)
random.seed(0)
Get example audio data
The Kitzes Lab has created a small labeled dataset of short clips of American Woodcock vocalizations. You have two options for obtaining the folder of data, called woodcock_labeled_data:
Run the following cell to download this small dataset. These commands require you to have
tarinstalled on your computer, as they will download and unzip a compressed file in.tar.gzformat.Download a
.zipversion of the files by clicking here. You will have to unzip this folder and place the unzipped folder in the same folder that this notebook is in.
Note: Once you have the data, you do not need to run this cell again.
[5]:
if Path("woodcock_labeled_data").is_dir():
    print("Data already downloaded and unzipped.")
else:
    subprocess.run(
        [
            "curl",
            "https://drive.google.com/uc?export=download&id=1Ly2M--dKzpx331cfUFdVuiP96QKGJz_P",
            "-L",
            "-o",
            "woodcock_labeled_data.tar.gz",
        ]
    )  # Download the data
    subprocess.run(
        ["tar", "-xzf", "woodcock_labeled_data.tar.gz"]
    )  # Unzip the downloaded tar.gz file
    subprocess.run(
        ["rm", "woodcock_labeled_data.tar.gz"]
    )  # Remove the file after its contents are unzipped
Data already downloaded and unzipped.
Load dataframe of files and labels
We need a dataframe with file paths in the index, so we manipulate the included one_hot_labels.csv slightly:
[6]:
# load one-hot labels dataframe
labels = pd.read_csv("./woodcock_labeled_data/one_hot_labels.csv").set_index("file")

# prepend the folder location to the file paths
labels.index = pd.Series(labels.index).apply(lambda f: "./woodcock_labeled_data/" + f)

# inspect
labels.head()
[6]:
| present | absent | |
|---|---|---|
| file | ||
| ./woodcock_labeled_data/d4c40b6066b489518f8da83af1ee4984.wav | 1 | 0 |
| ./woodcock_labeled_data/e84a4b60a4f2d049d73162ee99a7ead8.wav | 0 | 1 |
| ./woodcock_labeled_data/79678c979ebb880d5ed6d56f26ba69ff.wav | 1 | 0 |
| ./woodcock_labeled_data/49890077267b569e142440fa39b3041c.wav | 1 | 0 |
| ./woodcock_labeled_data/0c453a87185d8c7ce05c5c5ac5d525dc.wav | 1 | 0 |
Preprocessors
(As another reminder, you might not need to make your own preprocessor if you are using the CNN class. The CNN class creates its own preprocessor object by default and stores it in the .preprocessor attribute - you can modify that or overwrite it with your own)
Preprocessors prepare samples for use by machine learning algorithms by performing a sequential procedure on each sample, like a recipe. The procedure is defined by a Pipeline which contains a sequential set of steps called Actions. There are 3 important characteristics of Preprocessors and Actions:
A Preprocessor has a
pipelinewhich defines a list ofActionsto perform on each sampleActionscontain parameters that modify their behavior in the attribute.params. You can modify parameter values directly or use the action’s .set() method to change parameter values.Preprocessing can be performed with or without augmentation. The Preprocessor’s
.bypass_augmentationsboolean variable will determine whether Actions in the pipeline with attribute.is_augmentation==Trueare performed or bypassed
The default preprocessor class for CNNs, SpectrogramPreprocessor, loads audio in two distinct modes:
loading one sample per file
splitting files into clips, and creating a sample from each clip. You can see examples of each mode below. By default, OpenSoundscape’s CNN class loads one sample per row in the training dataframe during
.train(), but internally splits long audio files into clips when using.predict().
In this notebook, you will see how to edit, add, remove, and bypass Actions in the pipeline to modify the Preprocessing procedure.
The CNN class in OpenSoundscape has an internal Preprocessor object which it use to generate samples during training, validation, and prediction. We can modify or overwrite the cnn model’s preprocessor object if we want to change how it generates samples.
The starting point for most preprocessors will be the SpectrogramPreprocessor class, which loads audio files, creates spectrograms from the audio, performs various augmentations, and returns a pytorch Tensor.
Create a preprocessor
We need to tell the preprocessor the duration (in seconds) of each sample it should create.
[7]:
pre = SpectrogramPreprocessor(sample_duration=2.0, sample_rate=32000)
Datasets
A dataset pairs a set of samples (possibly including labels) with a preprocessor.
The dataset draws samples from its .df attribute which must be dataframe formatted in a a very specific way:
the index of the dataframe provides paths to audio samples
the columns are the class names
the values are 0 (absent/False) or 1 (present/True) for each sample and each class.
Note: you never have to manually create Datasets to train and predict with OpenSoundscape’s CNN class. They are created internally.
Initialize a dataset for short, labeled clips
For example, we’ve set up the labels dataframe with files as the index and classes as the columns, so we can use it to make an instance of AudioFileDataset. This dataset assumes that each file in the dataset is a single short clip; it does not split longer clips into segments. For a dataset for that purpose (AudioSplitterDataset), see more information in later sections.
[8]:
dataset = AudioFileDataset(labels, pre)
Generate a sample from a Dataset
We can ask a dataset for a specific sample using its numeric index, like accessing an element of a list. Each sample is a dictionary with two keys: ‘X’, the Tensor of the sample, and ‘y’, the Tensor of labels of the sample. The shape of ‘X’ is [channels, height, width] and the shape of ‘y’ is [number of classes].
[9]:
dataset[0] # loads and preprocesses the sample at row 0 of dataset.df
/Users/SML161/miniconda3/envs/opso_dev/lib/python3.13/site-packages/pandas/io/formats/format.py:1458: RuntimeWarning: overflow encountered in cast
  has_large_values = (abs_vals > 1e6).any()
[9]:
AudioSample(source=woodcock_labeled_data/d4c40b6066b489518f8da83af1ee4984.wav, start_time=0.0,end_time=2.0, labels=present    1.0
absent     0.0
Name: (./woodcock_labeled_data/d4c40b6066b489518f8da83af1ee4984.wav, 0.0, 2.0), dtype: float16)
Visualize multiple samples
Using a helper function, we can easily visualze a set of samples on a grid. We highly recommend inspecting your preprocessed samples in this way before training or predicting with a machine learning model. By inspecting the samples, you can confirm that your labeled data is reasonable and that the preprocessing is representing your samples in a reasonable way.
[10]:
from opensoundscape.preprocess.utils import show_tensor_grid

dataset = AudioFileDataset(labels, pre)

tensors = [dataset[i].data for i in range(9)]
sample_labels = [list(dataset[i].labels[dataset[i].labels > 0].index) for i in range(9)]

_ = show_tensor_grid(tensors, 3, labels=sample_labels)

Let’s see how the same sample is augmented differently on each of 9 passes through the dataset:
[11]:
from opensoundscape.preprocess.utils import show_tensor_grid

dataset = AudioFileDataset(labels, pre)

tensors = [dataset[2].data for i in range(9)]
sample_labels = [list(dataset[i].labels[dataset[i].labels > 0].index) for i in range(9)]

_ = show_tensor_grid(tensors, 3, labels=sample_labels)

Let’s repeat the exercise of inspecting preprocessed samples, this time without augmentation.
[12]:
dataset.bypass_augmentations = True

tensors = [dataset[i].data for i in range(9)]
sample_labels = [list(dataset[i].labels[dataset[i].labels > 0].index) for i in range(9)]

_ = show_tensor_grid(tensors, 3, labels=sample_labels)

Overlay augmentation
Overlay is a powerful Action that allows additional samples to be overlayed or blended with the original sample.
The additional samples are chosen from the overlay_files or overlay_df that is provided to the preprocessor when it is initialized. The index of the overlay_df must be paths to audio files. The dataframe can be simply an index containing audio files with no other columns, or it can have the same columns as the sample dataframe for the preprocessor.
Overlay is powerful for two reasons:
We can “diversify” a limited number of training samples to look like different samples (more training data)
We can make focal recordings look like PAM recordings (reduce domain shift from training data to application)
Overlay is closely related to the “MixUp” augmentation popular in computer vision. MixUp is typically applied in a scenario where two samples from the training set are mixed together (whereas Overlay can use a different set of samples to mix with the training samples), and MixUp sometimes uses label averaging/blending, whereas by default Overlay uses label addition.
[13]:
# initialize a preprocessor and provide a dataframe with samples to use as overlays
from opensoundscape.utils import make_clip_df
from glob import glob

overlay_files = glob("./woodcock_labeled_data/field_data/*.wav")
preprocessor = SpectrogramPreprocessor(
    2.0, sample_rate=32000, overlay_samples=overlay_files
)

# remove augmentations other than overlay
for name in [
    "time_mask",
    "frequency_mask",
    "adaptive_random_gain",
    "adaptive_random_noise",
    "random_wrap",
]:
    preprocessor.remove_action(name)
First we visualize the original woodcock recording and a background sample
[14]:
from opensoundscape import Audio, Spectrogram

plt.rcParams["figure.figsize"] = (3, 2)
print("Foreground target species")
Spectrogram.from_audio(Audio.from_file(labels.iloc[0].name, duration=2)).plot()
plt.show()
print("background sample")
Spectrogram.from_audio(Audio.from_file(overlay_files[0], duration=2)).plot()
Foreground target species

background sample
[14]:
<Axes: xlabel='Time (s)', ylabel='Frequency (Hz)'>

Let’s visualize the Overlay augmentation with different strengths (overlay_weight)
[15]:
plt.rcParams["figure.figsize"] = (6, 3)
tensors = []
overlay_weights = [0.01, 0.4, 0.7, 0.97]
for w in overlay_weights:
    preprocessor.pipeline.overlay.set(overlay_weight=w)
    dataset = AudioFileDataset(labels, preprocessor)
    np.random.seed(0)  # get the same overlay every time
    tensors.append(dataset[2].data)
_ = show_tensor_grid(tensors, 2, labels=overlay_weights)

DataLoaders and batch sizes
During machine learning tasks with Pytorch, a DataLoader is often used on top of a Dataset to “batch” samples - that is, to prepare multiple samples at once. A batch returned by a DataLoader will have an extra leading dimension for both ‘X’ and ‘y’; for instance, a batch_size of 16 would produce ‘X’ withs shape [16, 3, 224, 224] for 3-channel 224x224 tensors and ‘y’ with shape [16, 5] if the labels contain 5 classes (columns). OpenSoundscape uses DataLoaders internally to create batches
of samples during CNN training and prediction.
Subset samples from a Dataset
Preprocessors allow you to select a subset of samples using sample() and head() methods (like pandas DataFrames).
Note that these methods subset files from the index. They do not subset individual clips from files.
[16]:
print("Length of original dataset", len(dataset))
Length of original dataset 29
Select the first 10 samples (non-random):
[17]:
first_10_dataset = dataset.head(10)
print("Dataset length after selecting first 10 samples:", len(first_10_dataset))
Dataset length after selecting first 10 samples: 10
Randomly select an absolute number of samples:
[18]:
random_10_dataset = dataset.sample(n=10)
print("Dataset length after selecting random 10 samples:", len(random_10_dataset))
Dataset length after selecting random 10 samples: 10
Randomly select a fraction of samples
[19]:
fraction_dataset = dataset.sample(frac=0.5)
print("Dataset length after selecting random 50% of samples:", len(fraction_dataset))
Dataset length after selecting random 50% of samples: 14
Preprocess long audio files
AudioFileDataset can be customized with parameters for:
fractional overlap between consecutive samples
how to handle remaining audio at the end of a file (if it is shorter than the desired sample duration)
The CNN.predict() function uses AudioFileDataset internally, so that the user can specify long audio file paths and get back predictions on fixed-length clips.
Here’s an example of how to use AudioFileDataset to create several samples from a long audio file.
Note: you never have to manually create Datasets (AudioFileDataset) to train and predict with the CNN class. They are created internally.
[20]:
prediction_df = pd.DataFrame(
    index=["./woodcock_labeled_data/field_data/60s_field_data_sample_1.wav"]
)
[21]:
plt.rcParams["figure.figsize"] = [8, 3]
pre = SpectrogramPreprocessor(sample_duration=2.0, sample_rate=32000)
splitting_dataset = AudioFileDataset(prediction_df, pre, overlap_fraction=0.5)
splitting_dataset.bypass_augmentations = True

# get the first 9 samples and plot them
tensors = [splitting_dataset[i].data for i in range(9)]

_ = show_tensor_grid(tensors, 3)

Preprocessor pipelines and actions
Each Preprocessor class has a pipeline which is an ordered set of operations that are performed on each sample, in the form of a pandas.Series object. Each element of the series is an object of class Action (or one of its subclasses) and represents a transformation on the sample.
About Pipelines
The preprocessor’s Pipeline is the ordered list of Actions that the preprocessor performs on each sample.
The Pipeline is stored in the
preprocessor.pipelineattribute.You can modify the contents or order of Preprocessor Actions by overwriting the preprocessor’s
.pipelineattribute. When you modify this attribute, you must provide pd.Series with elements name:Action, where each Action is an instance of a class that sub-classesopensoundscape.preprocess.BaseAction.
Let’s Inspect the current pipeline of our preprocessor.
[22]:
# inspect the current pipeline (ordered sequence of Actions to take)
preprocessor = SpectrogramPreprocessor(sample_duration=2, sample_rate=32000)
preprocessor.pipeline
[22]:
load_audio               Action calling <bound method Audio.from_file o...
random_trim_audio        Augmentation Action calling <function trim_aud...
trim_audio               Action calling <function trim_audio at 0x16fc5...
adaptive_random_gain     Augmentation Action calling <function adaptive...
overlay                  __bypassed__ Augmentation Action with .params:...
adaptive_random_noise    Augmentation Action calling <function adaptive...
random_wrap              Augmentation Action calling <function random_w...
time_mask                Augmentation Action calling <function audio_ti...
to_spec                  Action calling <bound method Spectrogram.from_...
bandpass                 Action calling <function Spectrogram.bandpass ...
to_tensor                Action calling <function Spectrogram.to_image ...
frequency_mask           Augmentation Action calling <function frequenc...
rescale                  Action calling <function scale_tensor at 0x16f...
dtype: object
About actions
Each element of the preprocessor’s pipeline (a pd.Series) contains a name (string) and an action (Action)
Each Action takes a sample (and its labels), performs some transformation to them, and returns the sample (and its labels).
You can generate an Action based on a function like this : Action(fn=my_function, other parameters…). The function you pass (
my_functionin this case) must expect the sample as the first argument. It can then take additional parameters. For instance, if we define the function:def multiply(x,n): return x*nthen we can create an action to multiply by 3 with
action=Action(fn=multiply,n=3)Any customizable parameters for performing the Action are stored in a dictionary,
.params. These parameters can be modified directly (e.g.Action.params.param1=value1) or using the Action’s.set()method (e.g.action.set(param=value, param2=value2, ...))You can bypass an action in a pipeline by changing
Action.bypasstoTrueYou can declare whether an Action is an augmentation (should not be performed if bypass_augmentation=True) using its
.is_augmentationboolean attribute
Modify Actions
View default parameters for an Action
the .params attribute of an Action is a pandas Series containing parameters that can be modified
[23]:
# since the pipeline is a series, we can access elements like pipeline.to_spec as well as pipeline['to_spec']
preprocessor.pipeline.to_spec.params
[23]:
window_samples       None
window_length_sec    None
hop_samples          None
overlap_fraction     None
overlap_samples      None
fft_size             None
dtype: object
Modify Action parameters
we can modify parameters with the Action’s .set() method:
[24]:
preprocessor.pipeline.to_spec.set(window_samples=128)
or by accessing the parameter directly (params is a pandas Series)
[25]:
preprocessor.pipeline.to_spec.params.window_samples = 512
preprocessor.pipeline.to_spec.params["overlap_fraction"] = 0.75

preprocessor.pipeline.to_spec.params
[25]:
window_samples        512
window_length_sec    None
hop_samples          None
overlap_fraction     0.75
overlap_samples      None
fft_size             None
dtype: object
Bypass actions
Actions can be bypassed by changing the attribute .bypass=True. A bypassed action is never performed regardless of the .perform_augmentations attribute.
[26]:
# turn off augmentations other than random wrap
preprocessor.pipeline.adaptive_random_noise.bypass = True
preprocessor.pipeline.adaptive_random_gain.bypass = True
preprocessor.pipeline.time_mask.bypass = True
preprocessor.pipeline.frequency_mask.bypass = True

# printing the preprocessor will show which actions are bypassed
preprocessor
[26]:
load_audio
dtype:
load_metadata: True
start_timestamp: None
out_of_bounds_mode: ignore
random_trim_audio (Augmentation)
extend: True
random_trim: True
tol: 1e-10
trim_audio
extend: True
random_trim: False
tol: 1e-10
adaptive_random_gain (Bypassed) (Augmentation)
min_output_level: -40
clip_range: (-1, 1)
overlay (Bypassed) (Augmentation)
break_on_key: overlay
overlay_class: None
overlay_prob: 1
max_overlay_num: 1
overlay_weight: 0.5
criterion_fn:
sample_duration: 2
adaptive_random_noise (Bypassed) (Augmentation)
input_gain: 0
color: white
random_wrap (Augmentation)
max_shift: None
time_mask (Bypassed) (Augmentation)
max_width: 0.02
noise_to_signal_dB: 10
noise_color: white
to_spec
window_length_sec: None
hop_samples: None
overlap_fraction: 0.75
overlap_samples: None
fft_size: None
bandpass
max_f: 16000.0
out_of_bounds_ok: False
to_tensor
channels: 1
colormap: None
invert: False
return_type: torch
range: (-80, 0)
dB: True
frequency_mask (Bypassed) (Augmentation)
max_width: 0.05
rescale
input_std: 0.5
create a Dataset with this preprocessor and our label dataframe
[27]:
plt.rcParams["figure.figsize"] = [6, 2]
dataset = AudioFileDataset(labels, preprocessor)

print("random wrap off")
preprocessor.pipeline.random_wrap.bypass = True
tensors = [dataset[0].data for i in range(4)]
show_tensor_grid(tensors, 4)
plt.show()
print("random wrap on")
preprocessor.pipeline.random_wrap.bypass = False
tensors = [dataset[0].data for i in range(4)]
_ = show_tensor_grid(tensors, 4)
random wrap off

random wrap on

To view whether an individual Action in a pipeline is on or off, inspect its bypass attribute:
[28]:
# The AudioLoader Action that is still on
preprocessor.pipeline.load_audio.bypass
[28]:
False
[29]:
# The frequency_mask Action that we turned off
preprocessor.pipeline.frequency_mask.bypass
[29]:
True
Modify the pipeline
Sometimes, you may want to change the order or composition of the Preprocessor’s pipeline. You can simply overwrite the .pipeline attribute, as long as it is a pandas Series of names:Actions
Example: return Spectrogram instead of Tensor
Here’s an example where we replace the pipeline with one that just loads audio and converts it to a Spectrogram, returning a Spectrogram instead of a Tensor:
[ ]:
# initialize a preprocessor
preprocessor = SpectrogramPreprocessor(2.0, sample_rate=32000)
print("original preprocessor:")
preprocessor
original preprocessor:
load_audio
dtype:
load_metadata: True
start_timestamp: None
out_of_bounds_mode: ignore
random_trim_audio (Augmentation)
extend: True
random_trim: True
tol: 1e-10
trim_audio
extend: True
random_trim: False
tol: 1e-10
adaptive_random_gain (Augmentation)
min_output_level: -40
clip_range: (-1, 1)
overlay (Bypassed) (Augmentation)
break_on_key: overlay
overlay_class: None
overlay_prob: 1
max_overlay_num: 1
overlay_weight: 0.5
criterion_fn:
sample_duration: 2.0
adaptive_random_noise (Augmentation)
input_gain: 0
color: white
random_wrap (Augmentation)
max_shift: None
time_mask (Augmentation)
max_width: 0.02
noise_to_signal_dB: 10
noise_color: white
to_spec
window_length_sec: None
hop_samples: None
overlap_fraction: None
overlap_samples: None
fft_size: None
bandpass
max_f: 16000.0
out_of_bounds_ok: False
to_tensor
channels: 1
colormap: None
invert: False
return_type: torch
range: (-80, 0)
dB: True
frequency_mask (Augmentation)
max_width: 0.05
rescale
input_std: 0.5
[ ]:
# overwrite the pipeline with a slice of the original pipeline
print("\n new pipeline:")
preprocessor.pipeline = preprocessor.pipeline[0:9]

print("\nWe now have a preprocessor that returns Spectrograms instead of Tensors:")
dataset = AudioFileDataset(labels, preprocessor)
print(f"Type of returned sample: {type(dataset[0].data)}")
preprocessor
 new pipeline:

We now have a preprocessor that returns Spectrograms instead of Tensors:
Type of returned sample: <class 'opensoundscape.spectrogram.Spectrogram'>
load_audio
dtype:
load_metadata: True
start_timestamp: None
out_of_bounds_mode: ignore
random_trim_audio (Augmentation)
extend: True
random_trim: True
tol: 1e-10
trim_audio
extend: True
random_trim: False
tol: 1e-10
adaptive_random_gain (Augmentation)
min_output_level: -40
clip_range: (-1, 1)
overlay (Bypassed) (Augmentation)
break_on_key: overlay
overlay_class: None
overlay_prob: 1
max_overlay_num: 1
overlay_weight: 0.5
criterion_fn:
sample_duration: 2.0
adaptive_random_noise (Augmentation)
input_gain: 0
color: white
random_wrap (Augmentation)
max_shift: None
time_mask (Augmentation)
max_width: 0.02
noise_to_signal_dB: 10
noise_color: white
to_spec
window_length_sec: None
hop_samples: None
overlap_fraction: None
overlap_samples: None
fft_size: None
Analyze/debug the pipeline
In order to debug the Preprocessor’s pipeline you can utilize the trace argument to save and review the output of action step in the pipeline as part of the sample information returned by the preprocessor.
[38]:
# initialize a preprocessor
preprocessor = SpectrogramPreprocessor(2.0, sample_rate=32000)
preprocessor
[38]:
load_audio
dtype:
load_metadata: True
start_timestamp: None
out_of_bounds_mode: ignore
random_trim_audio (Augmentation)
extend: True
random_trim: True
tol: 1e-10
trim_audio
extend: True
random_trim: False
tol: 1e-10
adaptive_random_gain (Augmentation)
min_output_level: -40
clip_range: (-1, 1)
overlay (Bypassed) (Augmentation)
break_on_key: overlay
overlay_class: None
overlay_prob: 1
max_overlay_num: 1
overlay_weight: 0.5
criterion_fn:
sample_duration: 2.0
adaptive_random_noise (Augmentation)
input_gain: 0
color: white
random_wrap (Augmentation)
max_shift: None
time_mask (Augmentation)
max_width: 0.02
noise_to_signal_dB: 10
noise_color: white
to_spec
window_length_sec: None
hop_samples: None
overlap_fraction: None
overlap_samples: None
fft_size: None
bandpass
max_f: 16000.0
out_of_bounds_ok: False
to_tensor
channels: 1
colormap: None
invert: False
return_type: torch
range: (-80, 0)
dB: True
frequency_mask (Augmentation)
max_width: 0.05
rescale
input_std: 0.5
[39]:
# pass a sample through the preprocessor's pipeline
file = labels.iloc[0].name
start_time = 0
sample = preprocessor.forward((file, start_time), trace=True)
sample.trace
[39]:
load_audio                    <Audio(samples=(64000,), sample_rate=32000)>
random_trim_audio             <Audio(samples=(64000,), sample_rate=32000)>
trim_audio                    <Audio(samples=(64000,), sample_rate=32000)>
adaptive_random_gain          <Audio(samples=(64000,), sample_rate=32000)>
overlay                                                                NaN
adaptive_random_noise         <Audio(samples=(64000,), sample_rate=32000)>
random_wrap                   <Audio(samples=(64000,), sample_rate=32000)>
time_mask                     <Audio(samples=(64000,), sample_rate=32000)>
to_spec                  <Spectrogram(spectrogram=(257, 249), frequenci...
bandpass                 <Spectrogram(spectrogram=(257, 249), frequenci...
to_tensor                [[[tensor(0.3930), tensor(0.4607), tensor(0.48...
frequency_mask           [[[tensor(0.3930), tensor(0.4607), tensor(0.48...
rescale                  [[[tensor(-0.2140), tensor(-0.0786), tensor(-0...
dtype: object
Analyze the output at steps of interest
[40]:
# Initial audio
sample.trace["load_audio"].normalize()
[40]:
[41]:
# Initial spectrogram
sample.trace["to_spec"].plot()
[41]:
<Axes: xlabel='Time (s)', ylabel='Frequency (Hz)'>

[42]:
# After applyin frequency mask
show_tensor(sample.trace["frequency_mask"])

Save and load preprocessors
preprocessors can be exported to dictionaries and saved to .yml or .json
This process retains all parameters and any customizations to the pipeline, with one exception: the Overlay action of a preprocessor does not retain the overlay_df attribute, which would be potentially very large and complex to store. Instead, the user should re-specify the .overlay_df attribute of any Overlay action in the preprocessor pipeline as needed.
[43]:
pre.save("./my_pre.json")  # supports json and yml formats
reloaded_preprocessor = preprocess.preprocessors.load("./my_pre.json")
reloaded_preprocessor
/Users/SML161/opensoundscape/opensoundscape/preprocess/overlay.py:126: UserWarning: Overlay class's .overlay_df will be None after loading from dict and `.criterion_fn` will be always_true(). Reset these attributes and set .bypass to False to use Overlay after loading with from_dict().
  warnings.warn(
[43]:
load_audio
dtype:
load_metadata: True
start_timestamp: None
out_of_bounds_mode: ignore
random_trim_audio (Augmentation)
extend: True
random_trim: True
tol: 1e-10
trim_audio
extend: True
random_trim: False
tol: 1e-10
adaptive_random_gain (Augmentation)
min_output_level: -40
clip_range: [-1, 1]
overlay (Bypassed) (Augmentation)
break_on_key: overlay
overlay_class: None
overlay_prob: 1
max_overlay_num: 1
overlay_weight: 0.5
criterion_fn:
sample_duration: 2.0
adaptive_random_noise (Augmentation)
input_gain: 0
color: white
random_wrap (Augmentation)
max_shift: None
time_mask (Augmentation)
max_width: 0.02
noise_to_signal_dB: 10
noise_color: white
to_spec
window_length_sec: None
hop_samples: None
overlap_fraction: None
overlap_samples: None
fft_size: None
bandpass
max_f: 16000.0
out_of_bounds_ok: False
to_tensor
channels: 1
colormap: None
invert: False
return_type: torch
range: [-80, 0]
dB: True
frequency_mask (Augmentation)
max_width: 0.05
rescale
input_std: 0.5
[44]:
# to and from dictionary methods:
SpectrogramPreprocessor.from_dict(pre.to_dict())
/Users/SML161/opensoundscape/opensoundscape/preprocess/overlay.py:126: UserWarning: Overlay class's .overlay_df will be None after loading from dict and `.criterion_fn` will be always_true(). Reset these attributes and set .bypass to False to use Overlay after loading with from_dict().
  warnings.warn(
[44]:
load_audio
dtype:
load_metadata: True
start_timestamp: None
out_of_bounds_mode: ignore
random_trim_audio (Augmentation)
extend: True
random_trim: True
tol: 1e-10
trim_audio
extend: True
random_trim: False
tol: 1e-10
adaptive_random_gain (Augmentation)
min_output_level: -40
clip_range: (-1, 1)
overlay (Bypassed) (Augmentation)
break_on_key: overlay
overlay_class: None
overlay_prob: 1
max_overlay_num: 1
overlay_weight: 0.5
criterion_fn:
sample_duration: 2.0
adaptive_random_noise (Augmentation)
input_gain: 0
color: white
random_wrap (Augmentation)
max_shift: None
time_mask (Augmentation)
max_width: 0.02
noise_to_signal_dB: 10
noise_color: white
to_spec
window_length_sec: None
hop_samples: None
overlap_fraction: None
overlap_samples: None
fft_size: None
bandpass
max_f: 16000.0
out_of_bounds_ok: False
to_tensor
channels: 1
colormap: None
invert: False
return_type: torch
range: (-80, 0)
dB: True
frequency_mask (Augmentation)
max_width: 0.05
rescale
input_std: 0.5
If any custom code is used (e.g., custom action functions, custom actions, or a custom preprocessor class), the code that defines those functions needs to be available when the preprocessor is reloaded, and the functions or classes need to be “registered” so that OpenSoundscape can look them up. Here are examples of registering a custom Action, action_fn, and Preprocessor class
[45]:
@preprocess.preprocessors.register_preprocessor_cls
class CustomPreprocessor(SpectrogramPreprocessor):
    def __init__(self, sample_duration):
        super().__init__(sample_duration)
        self.pipeline.add_noise.bypass = True


# we can now save and load CustomPreprocessor from files, as long as the code above is also
# available in the script that loads the preprocessor


@preprocess.actions.register_action_cls
class MyAction(preprocess.actions.Action):
    def __init__(self, param1):
        super().__init__()
        self.param1 = param1


# we can now save and load preprocessors that include MyAction from files, as long as the code above
# is also available in the script that loads the action


@preprocess.action_functions.register_action_fn
def my_action_fn(sample, param1):
    return sample * param1


action = preprocess.actions.Action(my_action_fn, param1=2.0)

# we can now save and load preprocessors that include Actions calling my_action from files,
# as long as the code above is also available in the script that loads the action function
Add Preprocessor to CNN
You can always overwrite the preprocessor of a CNN model object with a new one:
my_preprocessor = SpectrogramPreprocessor(....)
...
model.preprocessor = my_preprocessor
WARNING: Be careful! If your new preprocessor has a different sample duration (eg 3 seconds instead of 2) or shape (eg [100,100,3] instead of [224,224,1]), these new values will also take effect when using the CNN.
Customize preprocessing for better training
The right choice of preprocessing depends heavily on the characteristics of the sounds you wish to study. The best way to tune preprocessing parameters is to visually inspect samples created by your preprocessing procedure and tweak parameters to achieve visual clarity of the sounds of interest in your samples. We find these heuristics to be a good starting point:
The duration of a sample should be approximately 2-5x the duration of the target sound. For instance, a very short nocturnal flight call lasting 0.1 seconds might be best visualized with a 0.3 second sample_duration. Meahwhile, a 10-second bout of ruffed grouse drumming might deserve a 20 second sample_duartion.
The frequency range of a sample should be wider than the target sound, but not by more than 1 order of magnitude. For instance, sounds that are low-pitched will be more clearly visualized when bandpassing a spectrogram to the low frequencies. If you use a 0-10,000 Hz spectrogram for a 500 Hz target sound, your target sound will only occupy a small fraction of your sample.
Spectrogram parameters should be matched to the temporal or spectral features of the target sound. Modify the Spectorgram’s window_samples to achieve high enough time resolution (lower value of window_samples) or frequency resolution (higher value of window_samples) to see features of your target sound clearly on the resulting sample. For example, a rapid trill with a pulse repetition rate of 50 Hz will only be distinctive on a spectrogram if the Spectrogram windows are less than
1/(50*2) = 0.01seconds in duration. On the other hand, visualizing a distinctive harmonic “ladder” structure of a nasal sound might require long spectrogram windows which will increase frequency resolution.
Augmentations are Actions that are only performed during training, not during prediction. These actions manipulate the sample in some randomized way, so that each time the same sample is provided to the model as training data, the actual values of the sample are different. This prevents over-training of a model on a training set and effectively increases the size of a training dataset. In general, you can expect that a basic set of augmentations (such as those included by default in the SpecPreprocessor and CNN classes) will be necessary to train a useful machine learning model. In particular, “overlay” augmentations which blend together multiple samples often increase the generalizability (transferability) of a model. You might choose to use audio from your target system (for instance, field recordings at your study site) to make the training data look more similar to the data that the model will be applied to.
Below are various examples of how to modify parameters of the Actions to achieve different preprocessing outcomes.
Modify the sample rate
Resample all loaded audio to a specified rate during the load_audio action
[46]:
pre = SpectrogramPreprocessor(sample_duration=2.0, sample_rate=32000)

pre.pipeline.load_audio.set(sample_rate=24000)
Modify spectrogram window length and overlap
(see Spectrogram.from_audio() for detailed documentation)
[47]:
dataset = AudioFileDataset(
    labels, SpectrogramPreprocessor(sample_duration=2, sample_rate=32000)
)
dataset.bypass_augmentations = True

print("default parameters:")
show_tensor(dataset[0].data)
plt.show()

print("high time resolution, low frequency resolution:")
dataset.preprocessor.pipeline.to_spec.set(window_samples=128)

show_tensor(dataset[0].data)
default parameters:

high time resolution, low frequency resolution:

Bandpass spectrograms
Trim spectrograms to a specified frequency range:
[48]:
dataset = AudioFileDataset(labels, SpectrogramPreprocessor(2.0, sample_rate=32000))

print("default parameters:")
show_tensor(dataset[0].data, invert=True)

print("bandpassed to 2-4 kHz:")
dataset.preprocessor.pipeline.bandpass.set(min_f=2000, max_f=4000)
show_tensor(dataset[0].data)
default parameters:
bandpassed to 2-4 kHz:

Change the output shape
Change the shape of the output sample
First, inspect the .height, .width, and .channels attributes of the preprocessor, which determine the shape of the output. Values of “None” mean that the output is not reshaped, the preprocessors simply retains the shape of tensors created in the pipeline.
[49]:
dataset.preprocessor.height, dataset.preprocessor.width, dataset.preprocessor.channels
[49]:
(None, None, 1)
[50]:
dataset = AudioFileDataset(labels, SpectrogramPreprocessor(2.0, sample_rate=32000))

dataset.preprocessor.height = 100
dataset.preprocessor.width = 500
dataset.preprocessor.channels = 3
show_tensor(dataset[0].data, invert=True)

Turn all augmentation on or off
augmentation is controlled by the preprocessor.bypass_augmentation boolean (aka True/False) variable. By default, augmentations are performed. A CNN will internally manipulate this attribute to perform augmentations during training but not during validation or prediction.
[51]:
dataset = AudioFileDataset(labels, SpectrogramPreprocessor(2.0, sample_rate=32000))

dataset.bypass_augmentations = True
show_tensor(dataset[0].data)

[52]:
dataset.bypass_augmentations = False
show_tensor(dataset[0].data)

Modify augmentation parameters
SpectrogramPreprocessor includes several augmentations with customizable parameters. Here we provide a couple of illustrative examples - see any action’s documentation for details on how to use its parameters.
[53]:
plt.rcParams["figure.figsize"] = [5, 5]
# initialize a preprocessor
preprocessor = SpectrogramPreprocessor(2.0, sample_rate=32000)

# turn off augmentations
preprocessor.pipeline.random_wrap.bypass = True
preprocessor.pipeline.time_mask.bypass = True
preprocessor.pipeline.adaptive_random_gain.bypass = True
preprocessor.pipeline.adaptive_random_noise.bypass = True


# allow up to 20 horizontal masks, each spanning up to 0.1x the height of the image.
preprocessor.pipeline.frequency_mask.set(max_width=0.03, max_masks=20)

# preprocess the same sample 4 times
dataset = AudioFileDataset(labels, preprocessor)
tensors = [dataset[0].data for i in range(4)]
_ = show_tensor_grid(tensors, 2)
plt.show()

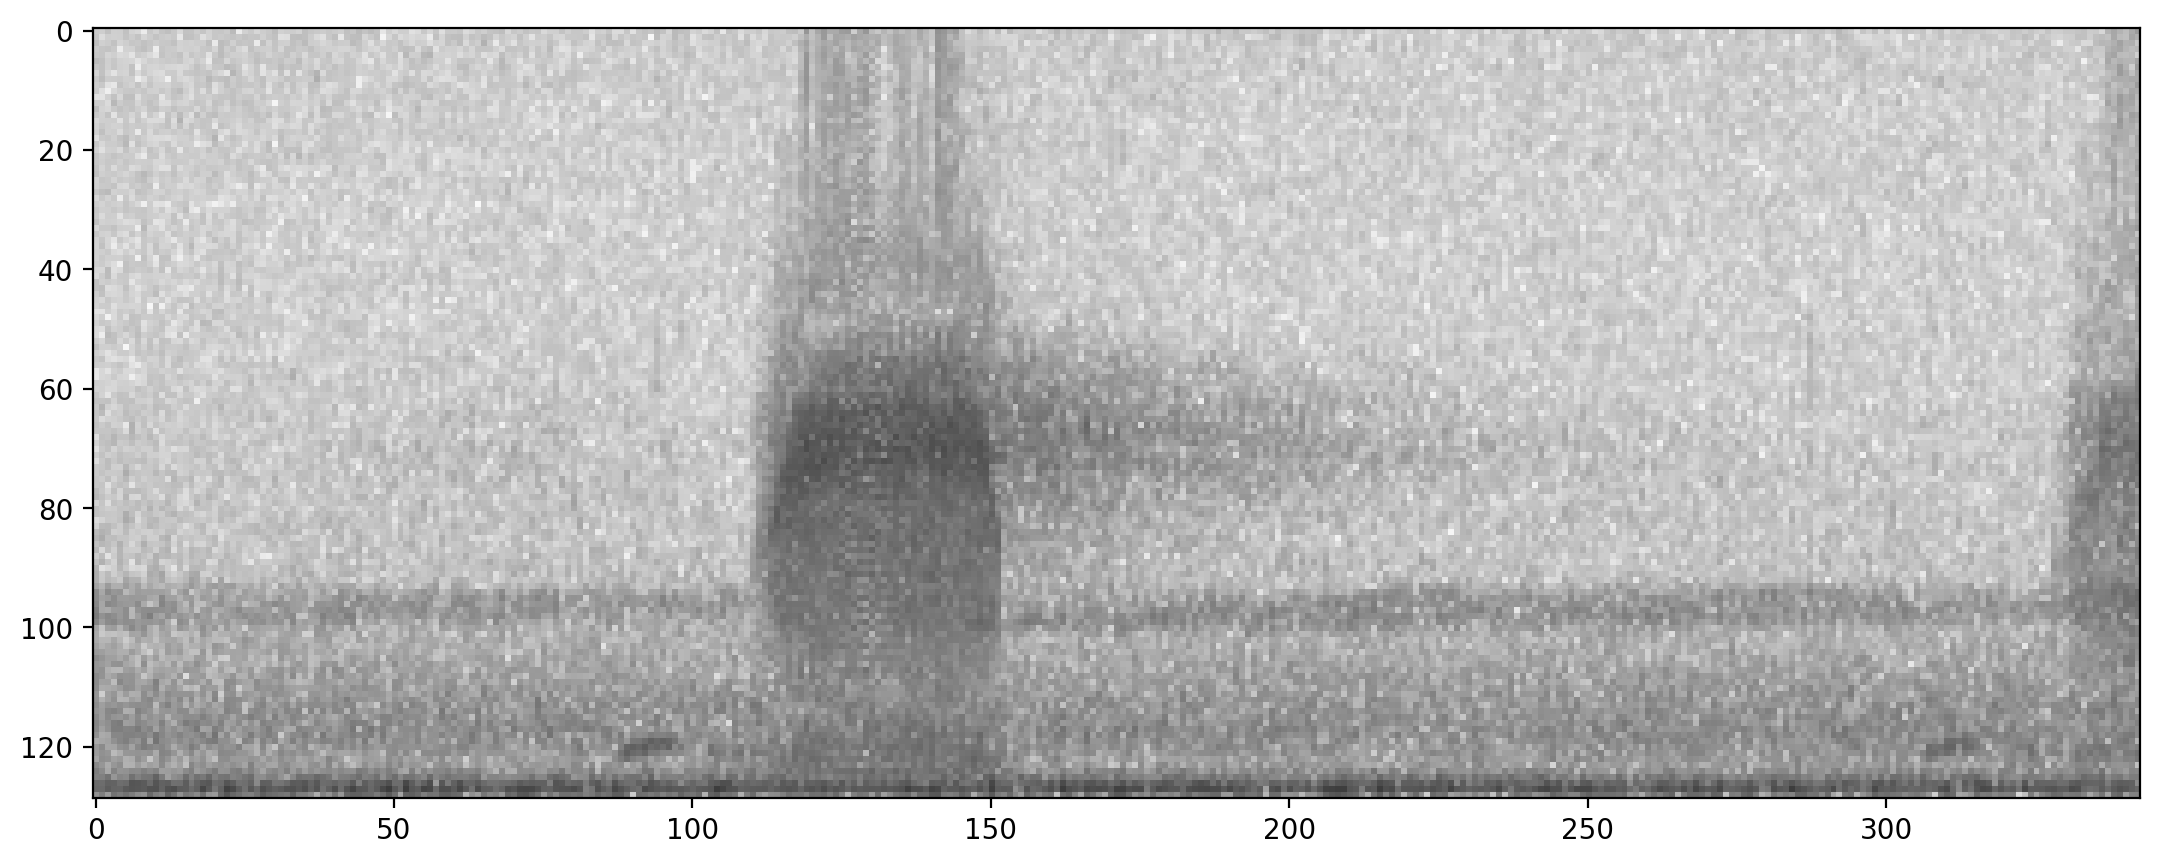
turn off frequency mask and turn on gaussian noise
[54]:
dataset.preprocessor
[54]:
load_audio
dtype:
load_metadata: True
start_timestamp: None
out_of_bounds_mode: ignore
random_trim_audio (Augmentation)
extend: True
random_trim: True
tol: 1e-10
trim_audio
extend: True
random_trim: False
tol: 1e-10
adaptive_random_gain (Bypassed) (Augmentation)
min_output_level: -40
clip_range: (-1, 1)
overlay (Bypassed) (Augmentation)
break_on_key: overlay
overlay_class: None
overlay_prob: 1
max_overlay_num: 1
overlay_weight: 0.5
criterion_fn:
sample_duration: 2.0
adaptive_random_noise (Bypassed) (Augmentation)
input_gain: 0
color: white
random_wrap (Bypassed) (Augmentation)
max_shift: None
time_mask (Bypassed) (Augmentation)
max_width: 0.02
noise_to_signal_dB: 10
noise_color: white
to_spec
window_length_sec: None
hop_samples: None
overlap_fraction: None
overlap_samples: None
fft_size: None
bandpass
max_f: 16000.0
out_of_bounds_ok: False
to_tensor
channels: 1
colormap: None
invert: False
return_type: torch
range: (-80, 0)
dB: True
frequency_mask (Augmentation)
max_width: 0.03
rescale
input_std: 0.5
[55]:
dataset.preprocessor.pipeline.adaptive_random_noise.bypass = False
dataset.preprocessor.pipeline.adaptive_random_gain.bypass = True
dataset.preprocessor.pipeline.frequency_mask.bypass = True

# increase the intensity of gaussian noise added to the image
dataset.preprocessor.pipeline.adaptive_random_noise.set(snr_range=(3, 5))
show_tensor(dataset[0].data)
Remove an action by its name
[56]:
preprocessor.remove_action("random_wrap")
preprocessor.pipeline
[56]:
load_audio               Action calling <bound method Audio.from_file o...
random_trim_audio        Augmentation Action calling <function trim_aud...
trim_audio               Action calling <function trim_audio at 0x16fc5...
adaptive_random_gain     __bypassed__Augmentation Action calling <funct...
overlay                  __bypassed__ Augmentation Action with .params:...
adaptive_random_noise    Augmentation Action calling <function adaptive...
time_mask                __bypassed__Augmentation Action calling <funct...
to_spec                  Action calling <bound method Spectrogram.from_...
bandpass                 Action calling <function Spectrogram.bandpass ...
to_tensor                Action calling <function Spectrogram.to_image ...
frequency_mask           __bypassed__Augmentation Action calling <funct...
rescale                  Action calling <function scale_tensor at 0x16f...
dtype: object
Add an action at a specific position
specify the action in the pipeline you want to insert before or after
[57]:
from opensoundscape.preprocess.actions import Action
from opensoundscape.preprocess.action_functions import tensor_add_noise

preprocessor.insert_action(
    action_index="add_noise_NEW",  # give it a name
    action=Action(tensor_add_noise, std=0.01),  # the action object
    after_key="to_tensor",  # where to put it (can also use before_key=...)
)
[58]:
preprocessor.pipeline
[58]:
load_audio               Action calling <bound method Audio.from_file o...
random_trim_audio        Augmentation Action calling <function trim_aud...
trim_audio               Action calling <function trim_audio at 0x16fc5...
adaptive_random_gain     __bypassed__Augmentation Action calling <funct...
overlay                  __bypassed__ Augmentation Action with .params:...
adaptive_random_noise    Augmentation Action calling <function adaptive...
time_mask                __bypassed__Augmentation Action calling <funct...
to_spec                  Action calling <bound method Spectrogram.from_...
bandpass                 Action calling <function Spectrogram.bandpass ...
to_tensor                Action calling <function Spectrogram.to_image ...
add_noise_NEW            Action calling <function tensor_add_noise at 0...
frequency_mask           __bypassed__Augmentation Action calling <funct...
rescale                  Action calling <function scale_tensor at 0x16f...
dtype: object
it will complain if you use a non-unique index
[59]:
try:
    preprocessor.insert_action(
        action_index="add_noise_NEW",  # using the same name as a currentaction will lead to an AssertionError
        action=Action(tensor_add_noise, std=0.01),  # the action object
        after_key="to_tensor",  # where to put it (can also use before_key=...)
    )
except AssertionError:
    print("raised Assertion Error, as expected")
raised Assertion Error, as expected
Customizing Overlay augmentation
Overlay is a powerful Action that allows additional samples to be overlayed or blended with the original sample.
The set of samples used for overlay (overlay_df) can be just clips (file,start_time,end_time) or can contain labels (same format as training dataframes). If the overlay_df has labels, samples for overlays are chosen based on their class labels, according to the parameter overlay_class:
None- Randomly select any file fromoverlay_df"different"- Select a random file fromoverlay_dfcontaining none of the classes this file containsspecific class name - always choose files from this class
Overlay samples from a specific class
You can choose a specific class to choose samples from. Here, we use the training samples as the overlay df, and we choose overlay samples from the “absent” class.
[60]:
plt.rcParams["figure.figsize"] = [2, 2]
preprocessor = SpectrogramPreprocessor(2.0, overlay_samples=labels, sample_rate=32000)
dataset = AudioFileDataset(labels, preprocessor)

# remove augmentations other than overlay
for name in [
    "adaptive_random_gain",
    "time_mask",
    "frequency_mask",
    "adaptive_random_noise",
]:
    preprocessor.remove_action(name)

dataset.preprocessor.pipeline.overlay.set(overlay_class="present", overlay_weight=0.4)
show_tensor(dataset[0].data)

Overlaying samples from any class
By default, or by specifying overlay_class=None, the overlay sample is chosen randomly from the overlay_df with no restrictions.
[61]:
dataset.preprocessor.pipeline.overlay.set(overlay_class=None)
s = dataset[0]
print(s.labels)
show_tensor(s.data)
present    1.0
absent     0.0
Name: (./woodcock_labeled_data/d4c40b6066b489518f8da83af1ee4984.wav, 0.0, 2.0), dtype: float16
/Users/SML161/miniconda3/envs/opso_dev/lib/python3.13/site-packages/pandas/io/formats/format.py:1458: RuntimeWarning: overflow encountered in cast
  has_large_values = (abs_vals > 1e6).any()

Overlaying samples from a “different” class
The 'different' option for overlay_class chooses a sample to overlay that has non-overlapping labels with the original sample.
In the case of this example, this has the same effect as drawing samples from the "negative" class a demonstrated above. In multi-class examples, this would draw from any of the samples not labeled with the class(es) of the original sample.
We’ll again use overlay_weight=0.8 to exaggerate the importance of the overlayed sample (80%) compared to the original sample (20%).
[62]:
dataset.preprocessor.pipeline.overlay.set(
    update_labels=False, overlay_class="different", overlay_weight=0.8
)
show_tensor(dataset[0].data)

Updating labels
By default, the overlay Action updates the labels of the sample it modifies, adding the labels of the overlayed sample.
For instance, if the overlayed sample has labels [1,0] and the original sample has labels [0,1], the default behavior will return a sample with labels [1,1].
If you wish to not add the labels from overlayed samples to the original sample’s labels, you can set update_labels=False.
[63]:
print("default: labels do not update")
dataset.preprocessor.pipeline.overlay.set(
    update_labels=False, overlay_class="different"
)
print(f"\t resulting labels: \n {dataset[1].labels}")

print("Using update_labels=True")
dataset.preprocessor.pipeline.overlay.set(update_labels=True, overlay_class="different")
print(f"\t resulting labels: \n {dataset[1].labels}")
default: labels do not update
         resulting labels:
 present    0.0
absent     1.0
Name: (./woodcock_labeled_data/e84a4b60a4f2d049d73162ee99a7ead8.wav, 0.0, 2.0), dtype: float16
Using update_labels=True
         resulting labels:
 present    1.0
absent     1.0
Name: (./woodcock_labeled_data/e84a4b60a4f2d049d73162ee99a7ead8.wav, 0.0, 2.0), dtype: float16
/Users/SML161/miniconda3/envs/opso_dev/lib/python3.13/site-packages/pandas/io/formats/format.py:1458: RuntimeWarning: overflow encountered in cast
  has_large_values = (abs_vals > 1e6).any()
/Users/SML161/miniconda3/envs/opso_dev/lib/python3.13/site-packages/pandas/io/formats/format.py:1458: RuntimeWarning: overflow encountered in cast
  has_large_values = (abs_vals > 1e6).any()
This example is a single-target problem: the two classes represent “woodcock absent” and “woodcock present.” Because the labels are mutually exclusive, labels [1,1] do not make sense. So, for this single-target problem, we would not want to use update_labels=True, and it would probably make most sense to only overlay absent recordings, e.g., overlay_class='absent'.
Create a new Preprocessor class
If you have a specific augmentation routine you want to perform, you may want to create your own Preprocessor class rather than modifying an existing one.
Your subclass might add a different set of Actions, define a different pipeline, or even override the __getitem__ method of BasePreprocessor.
Here’s an example of a customized preprocessor that subclasses AudioToSpectrogramPreprocessor and creates a pipeline that depends on the magic_parameter input.
[64]:
class MyPreprocessor(SpectrogramPreprocessor):
    """Child of AudioToSpectrogramPreprocessor with weird augmentation routine"""

    def __init__(
        self,
        magic_parameter,
        sample_duration,
        height=224,
        width=224,
        sample_rate=32000,
    ):

        super().__init__(
            sample_duration=sample_duration,
            height=height,
            width=width,
            sample_rate=sample_rate,
        )

        for i in range(magic_parameter):
            action = Action(tensor_add_noise, std=0.1 * magic_parameter)
            self.insert_action(f"noise_{i}", action)
[65]:
dataset = AudioFileDataset(
    labels, MyPreprocessor(sample_duration=2.0, magic_parameter=1)
)
show_tensor(dataset[0].data)

[66]:
dataset = AudioFileDataset(
    labels, MyPreprocessor(sample_duration=2.0, magic_parameter=4)
)
show_tensor(dataset[0].data)

Define new Actions
You can usually define a new action simply by passing a method to Action(). However, you can also write a subclass of Action for more advanced use cases.
[67]:
from opensoundscape.preprocess.actions import Action, BaseAction


class AudioGate(BaseAction):
    """Replace audio samples below a threshold with 0, but only if label[0]==1

    Audio in, Audio out

    Args:
        threshold: sample values below this will become 0
    """

    def __init__(self, threshold):
        super().__init__()
        self.params["threshold"] = threshold

    def __call__(self, sample, **kwargs):
        # note that __call__ method is what is called when we call the object as a function
        # eg action(sample) performs action.__call__(sample)
        # it takes an AudioSample object with .data attribute and modifies it in place
        threshold = 0.2
        audio = sample.data
        if sample.labels[0] == 1:
            samples = np.array(
                [0 if np.abs(s) < threshold else s for s in audio.samples]
            )
            sample.data = Audio(samples, audio.sample_rate)
Test it out:
[68]:
from opensoundscape import Audio, Spectrogram, AudioSample

gate_action = AudioGate(threshold=0.2)

print("histogram of samples")
audio = Audio.from_file("./woodcock_labeled_data/01c5d0c90bd4652f308fd9c73feb1bf5.wav")
sample = AudioSample(source=audio, labels={0: 1, 1: 0})

_ = plt.hist(audio.samples, bins=100)
plt.semilogy()
plt.show()

print("histogram of samples after audio gate")
gate_action(sample)
_ = plt.hist(sample.data.samples, bins=100)
plt.semilogy()
plt.show()

print("histogram of samples after audio gate, when labels[0]==0")
print("histogram of samples")
audio = Audio.from_file("./woodcock_labeled_data/01c5d0c90bd4652f308fd9c73feb1bf5.wav")
sample = AudioSample(source=audio, labels={0: 0, 1: 1})
gate_action(sample)
_ = plt.hist(sample.data.samples, bins=100)
plt.semilogy()
histogram of samples

histogram of samples after audio gate

histogram of samples after audio gate, when labels[0]==0
histogram of samples
[68]:
[]

Add custom Action to a preprocessor
For instance, if you want to use your custom Action while training a cnn, you can add it to the cnn.preprocessor’s pipeline.
In this example, we put the custom AudioGate action before the to_spec action.
[69]:
gate_action = AudioGate(threshold=0.2)
preprocessor.insert_action(
    action_index="custom_audio_gate",  # give it a name
    action=gate_action,
    before_key="to_spec",  # where to put it (can also use before_key=...)
)
[70]:
preprocessor.pipeline
[70]:
load_audio           Action calling <bound method Audio.from_file o...
random_trim_audio    Augmentation Action calling <function trim_aud...
trim_audio           Action calling <function trim_audio at 0x16fc5...
overlay              Augmentation Action with .params: \nupdate_lab...
random_wrap          Augmentation Action calling <function random_w...
custom_audio_gate    Action with .params: \nthreshold    0.2\ndtype...
to_spec              Action calling <bound method Spectrogram.from_...
bandpass             Action calling <function Spectrogram.bandpass ...
to_tensor            Action calling <function Spectrogram.to_image ...
rescale              Action calling <function scale_tensor at 0x16f...
dtype: object
Uncomment and run to remove files downloaded during this tutorial:
[71]:
# import shutil
# shutil.rmtree('./woodcock_labeled_data')

Path("./my_pre.json").unlink(missing_ok=True)